XCode 6 : SVN Checkin Checkout

The easiest way is probably to do this via the terminal.

  1. Close Xcode
  2. Go to the project’s folder in the Terminal (cd path/to/project)
  3. Use the svn importcommand:
    svn import -m "New Import"  MyProject/ https://myserver.me.com/svn/trunk/MyProject
  4. And finally checkout the project using
    svn co https://myserver.me.com/svn/trunk/MyProject

Custom Fonts in iOS 7 & iOS 8

You need your font in .otf or .ttf copied to your project. For example in Supporting Files.
You need to edit .plist file. Add “Fonts provided by application” key into your plist and in Item 0 copy the exact filename of the font you copied to your Supporting files WITH extension. For example: “JosefinSansStd-Light_0.otf”
Make sure that the font you imported to your app is being packed into app itself. Do that by selecting your Target, then Build Phases, then Copy Bundle Resources. If you don’t see your font in there, drag it from Supporting Files.
Finally, you would like to list all your fonts when the app starts just to see useable name for your font. You will do that with this little piece of code:

NSArray *fontFamilies = [UIFont familyNames];
for (int i = 0; i < [fontFamilies count]; i++)
{
    NSString *fontFamily = [fontFamilies objectAtIndex:i];
    NSArray *fontNames = [UIFont fontNamesForFamilyName:[fontFamilies objectAtIndex:i]];
    NSLog (@"%@: %@", fontFamily, fontNames);
}

Search for your font in printed results, for example, I would search for “Josefin” and I would see that actual font name is “JosefinSansStd-Light”. After that you only need to use that font by:

UIFont *customFont = [UIFont fontWithName:@"JosefinSansStd-Light" size:20];

In iOS8 you add your fonts directly to the project and they are visible in the interface builder. Modify your code to account for this but programmatically setting font for iOS7 and selecting it in xCode6 interface builder. PS. Interface builder in xCode6 gives you the correct font name that you can copy-paste into the code below.

#define SYSTEM_VERSION_LESS_THAN(v) ([[[UIDevice currentDevice] systemVersion] compare:v options:NSNumericSearch] == NSOrderedAscending)

 if(SYSTEM_VERSION_LESS_THAN(@"8.0"))
    {
        UIFont *customFont = [UIFont fontWithName:@"OpenSans-Light" size:32];
        self.registerLabel.font = customFont;  
    }

Cheers..

App Splash Screen Sizes (iOS, Android)

Android

Format

9-Patch PNG (recommended)

Dimensions

  • LDPI:
    • Portrait: 200x320px
    • Landscape: 320x200px
  • MDPI:
    • Portrait: 320x480px
    • Landscape: 480x320px
  • HDPI:
    • Portrait: 480x800px
    • Landscape: 800x480px
  • XHDPI:
    • Portrait: 720px1280px
    • Landscape: 1280x720px

iOS

Format

PNG (recommended)

Dimensions

  • Tablet (iPad)
    • Non-Retina (1x)
      • Portrait: 768x1024px
      • Landscape: 1024x768px
    • Retina (2x)
      • Portrait: 1536x2048px
      • Landscape: 2048x1536px
  • Handheld (iPhone, iPod)
    • Non-Retina (1x)
      • Portrait: 320x480px
      • Landscape: 480x320px
    • Retina (2x)
      • Portrait: 640x960px
      • Landscape: 960x640px
    • iPhone 5 Retina (2x)
      • Portrait: 640x1136px
      • Landscape: 1136x640px
    • iPhone 6 (2x)
      • Portrait: 750x1334px
      • Landscape: 1334x750px
    • iPhone 6 Plus (3x)
      • Portrait: 1242x2208px
      • Landscape: 2208x1242px

iOS: POD Error, mode 040777

Hello,

If you are getting Pod Error like below.

/System/Library/Frameworks/Ruby.framework/Versions/2.0/usr/lib/ruby/2.0.0/universal-darwin13/rbconfig.rb:213: warning: Insecure world writable dir /usr/local in PATH, mode 040777

Just simply give access of local folder to 755

Run below command on terminal and solve it.

sudo chmod 755 /usr/local

Enter your Mac password and solve it.

Cheers.

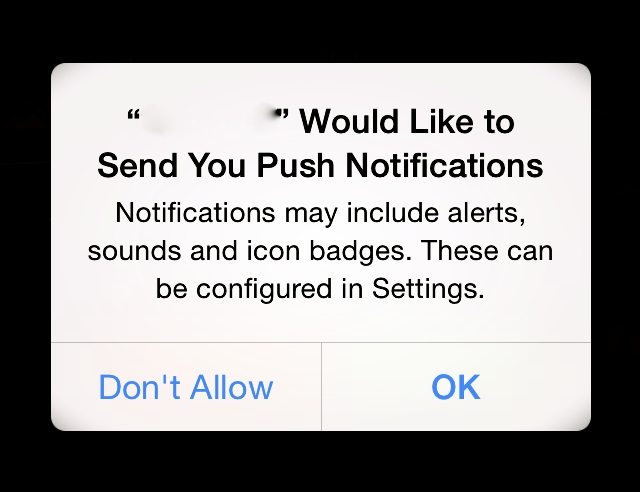
iOS APNS : Get back “Allow Push Notifications” dialog after it was dismissed once? ( APNS permissions popup )

APNS

Here’s how Apple say you can do it:

Resetting the Push Notifications Permissions Alert on iOS

The first time a push-enabled app registers for push notifications, iOS asks the user if they wish to receive notifications for that app. Once the user has responded to this alert it is not presented again unless the device is restored or the app has been uninstalled for at least a day.

If you want to simulate a first-time run of your app, you can leave the app uninstalled for a day. You can achieve the latter without actually waiting a day by following these steps:

1. Delete your app from the device.

2. Turn the device off completely and turn it back on.

3. Go to Settings > General > Date & Time and set the date ahead a day or more.

4. Turn the device off completely again and turn it back on.

iOS : UITableView to scroll to the selected UITextField or UITextView

- (void)viewDidLoad
{
    [super viewDidLoad];
    [[NSNotificationCenter defaultCenter] addObserver:self selector:@selector(keyboardWillShow:) name:UIKeyboardWillShowNotification object:nil];
    [[NSNotificationCenter defaultCenter] addObserver:self selector:@selector(keyboardWillHide:) name:UIKeyboardWillHideNotification object:nil];
}
- (void)keyboardWillShow:(NSNotification *)sender
{
    CGSize kbSize = [[[sender userInfo] objectForKey:UIKeyboardFrameEndUserInfoKey] CGRectValue].size;
    NSTimeInterval duration = [[[sender userInfo] objectForKey:UIKeyboardAnimationDurationUserInfoKey] doubleValue];
    
    [UIView animateWithDuration:duration animations:^{
        UIEdgeInsets edgeInsets = UIEdgeInsetsMake(0, 0, kbSize.height, 0);
        [self.tableView setContentInset:edgeInsets];
        [self.tableView setScrollIndicatorInsets:edgeInsets];
    }];
}

- (void)keyboardWillHide:(NSNotification *)sender
{
    NSTimeInterval duration = [[[sender userInfo] objectForKey:UIKeyboardAnimationDurationUserInfoKey] doubleValue];
    
    [UIView animateWithDuration:duration animations:^{
        UIEdgeInsets edgeInsets = UIEdgeInsetsZero;
        [self.tableView setContentInset:edgeInsets];
        [self.tableView setScrollIndicatorInsets:edgeInsets];
    }];
}

↪ UITextView

-(BOOL)textViewShouldBeginEditing:(UITextView *)textView
{
    UITableViewCell *cell = (UITableViewCell *)[textView superview];
    NSIndexPath *indexPath = [self.tableView indexPathForCell:cell];
    [self.tableView scrollToRowAtIndexPath:indexPath atScrollPosition:UITableViewScrollPositionTop animated:YES];
    return YES;
}

↪ UITextField

-(void) textFieldDidBeginEditing:(UITextField *)textField
{
    UITableViewCell *cell = (UITableViewCell *)[textField superview];
    NSIndexPath *indexPath = [self.tableView indexPathForCell:cell];
    [self.tableView scrollToRowAtIndexPath:indexPath atScrollPosition:UITableViewScrollPositionTop animated:YES];
}
NOTE : If NSIndexPath is equal to nil in some time, here is the code
↪ UITextView

-(BOOL)textViewShouldBeginEditing:(UITextView *)textView
{
    //find the UITableViewCell superview
    UIView *cell = textView;
    while (cell && ![cell isKindOfClass:[UITableViewCell class]])
        cell = cell.superview;
    
    //use the UITableViewCell superview to get the NSIndexPath
    NSIndexPath *indexPath = [self.tableView indexPathForRowAtPoint:cell.center];
    [self.tableView scrollToRowAtIndexPath:indexPath atScrollPosition:UITableViewScrollPositionTop animated:YES];
    return YES;
}

↪ UITextField

-(void) textFieldDidBeginEditing:(UITextField *)textField
{
    //find the UITableViewCell superview
    UIView *cell = textField;
    while (cell && ![cell isKindOfClass:[UITableViewCell class]])
        cell = cell.superview;
    
    //use the UITableViewCell superview to get the NSIndexPath
    NSIndexPath *indexPath = [self.tableView indexPathForRowAtPoint:cell.center];
    [self.tableView scrollToRowAtIndexPath:indexPath atScrollPosition:UITableViewScrollPositionTop animated:YES];
}

iOS : Remove or Add Custom Appearance From UIActivityViewController.

UIActivityCategoryShare

✓ UIActivityTypeMessage
✓ UIActivityTypeMail
✓ UIActivityTypePostToFacebook
✓ UIActivityTypePostToTwitter
✓ UIActivityTypePostToFlickr
✓ UIActivityTypePostToVimeo
✓ UIActivityTypePostToTencentWeibo
✓ UIActivityTypePostToWeibo

In Some time Custom Appearance is conflict with Activity View Controller. So here is the solution for this.

↪ Remove UIAppearance from Navigation Bar.

- (id) activityViewController:(UIActivityViewController *)activityViewController itemForActivityType:(NSString *)activityType
{
      [[UINavigationBar appearance] setBackgroundImage:nil forBarMetrics:UIBarMetricsDefault];
}

↪ After done activity add UIAppearance to Navigation Bar.

    [ActivityView setCompletionHandler:^(NSString *act, BOOL done)
     {
         UIImage *gradientImage = BAR_TEXTURE;
         [[UINavigationBar appearance] setBackgroundImage:gradientImage
                                            forBarMetrics:UIBarMetricsDefault];
     }];

iOS: Get NSString size when NSString includes Emojis.

NSString *text = //some text
CGFloat maxSize = //text size constraints

NSAttributedString *attributedString = [[NSAttributedString alloc] initWithString:text
                                                                       attributes:@{NSFontAttributeName : font
                                                                                    }];

CGRect boundingRect = [attributedString boundingRectWithSize:maxSize options:NSStringDrawingUsesLineFragmentOrigin context:nil];
CGSize fitSize = boundingRect.size;

Removing .svn or .git directories from a folder in Terminal

Well i was trying to find a way to remove all the .svn files from a directory on OSx.
I found this code worked the best for fully removing all .svn files recursively.

For .svn –> find . -name .svn -print0 | xargs -0 rm -rf

For .git –> find . -name .git -print0 | xargs -0 rm -rf

Remember to cd to the directory you are wanting to remove the .svn or .git files from.

cd bhavesh/project